Search K
Appearance
MinuteView Controller offers the ability to generate a set of files with predefined properties. These files can then be assigned to CAD users for completion.
The aim of this Basic Numbering usage guide is demonstrate how to setup these features.
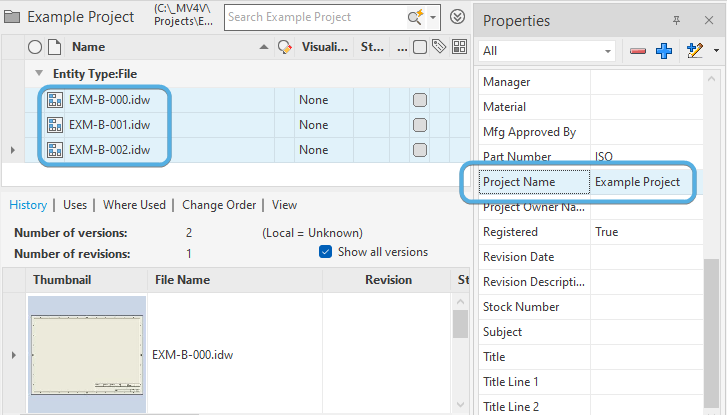
The below screenshot shows 3 files generated by the Numbering tool, along with their defined properties.
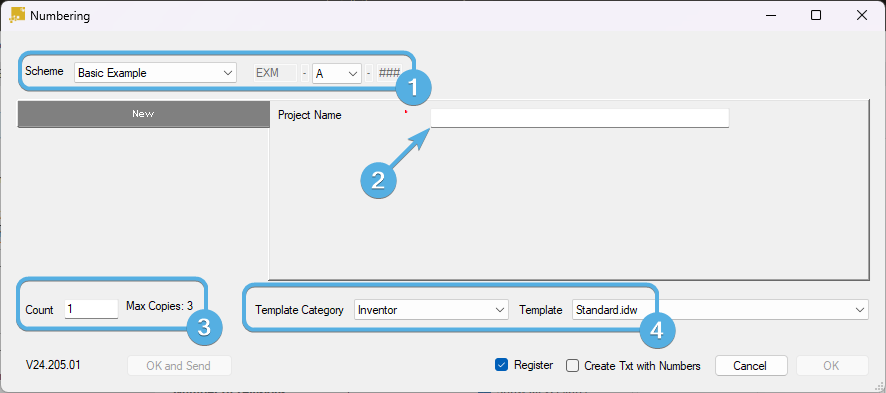
The below screenshot shows the Numbering Tool application, used within the Vault Client.
Follow the steps below to setup the Numbering tool.
Behaviours tab and select Define under the Numbering Schemes setting.
Basic Example.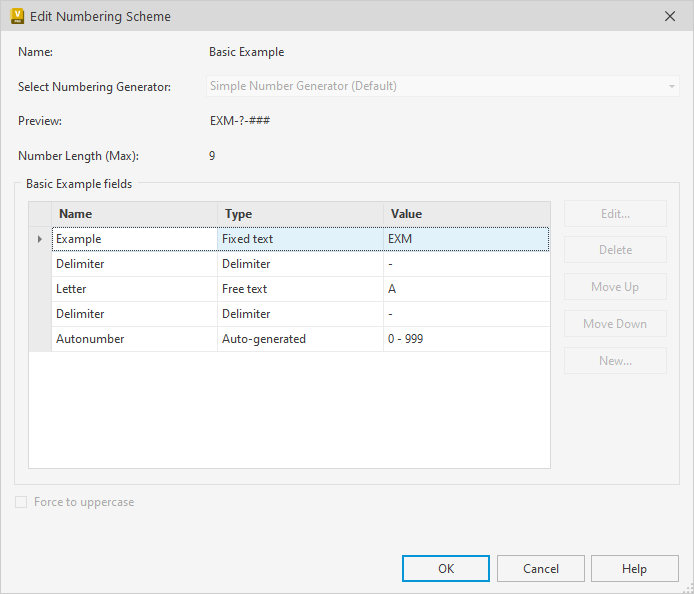
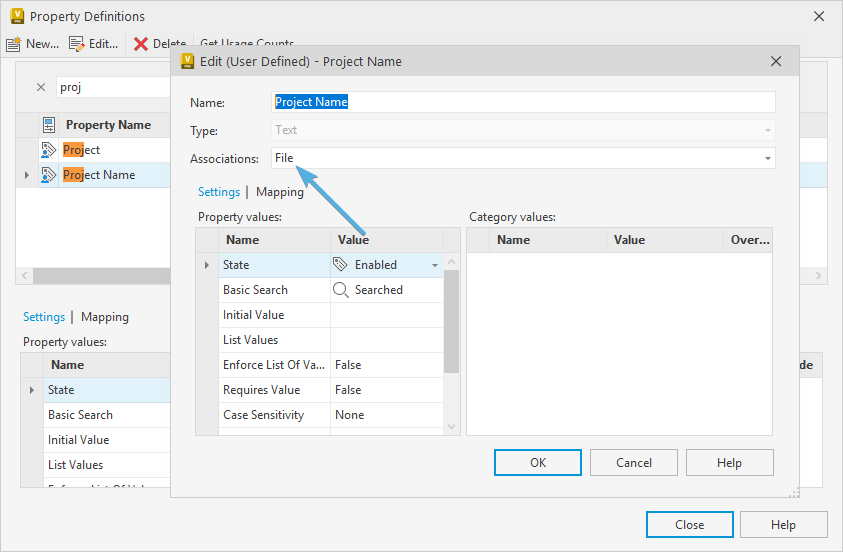
Behaviours tab -> Properties and define two new Vault Properties called:Project NameRegisteredAssociate both properties with "File".
standard.dwg Inventor template file.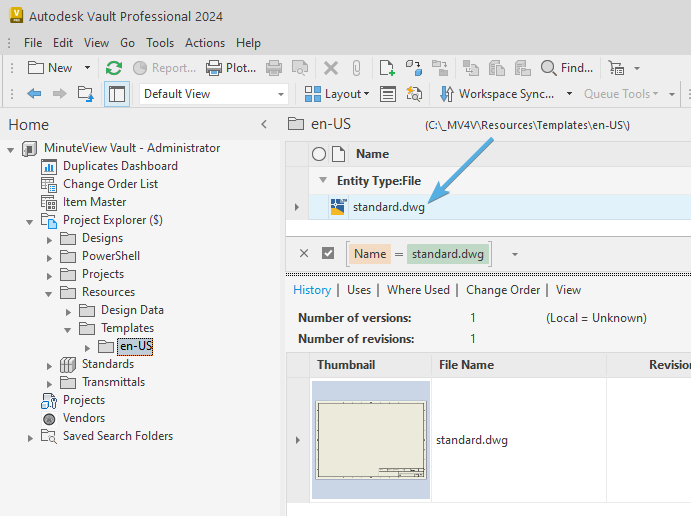
Note
The Vault Properties and also the assigned Vault category of the template file will carry through to the generated files, unless overwritten by the prompted field entries during the Register workflow.
With the Vault Numbering Scheme, Vault Property and the template file in place, we can now configure MinuteView Controller.
Enable Feature Setup page.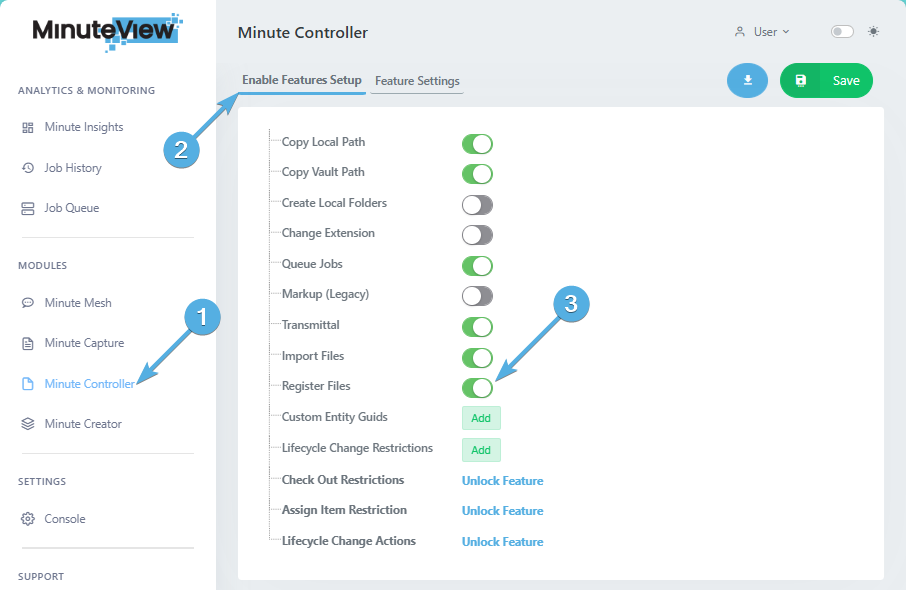
Enable the Register Files toggle and click Save.
TIP
If Register Files has been toggled from disabled to enabled, please also restart the Vault Client. A restart is only needed when a feature is enabled. A restart is not needed for the configuration of that feature (such as found in the following steps below).
Feature Settings tab.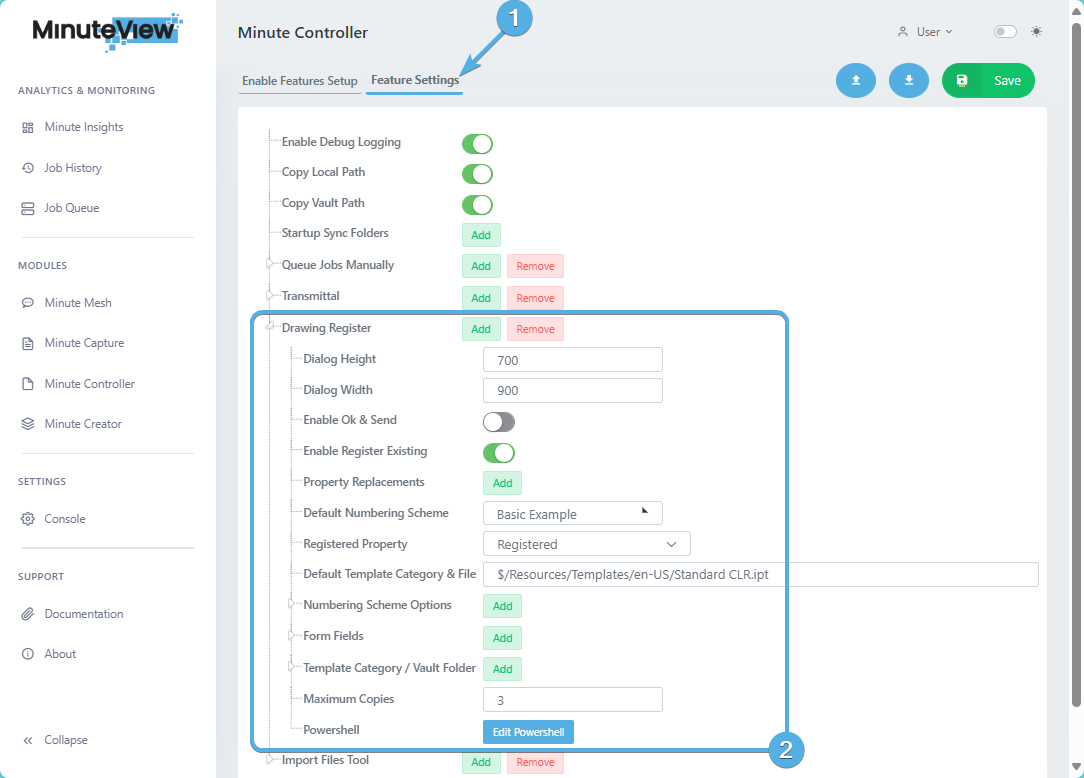
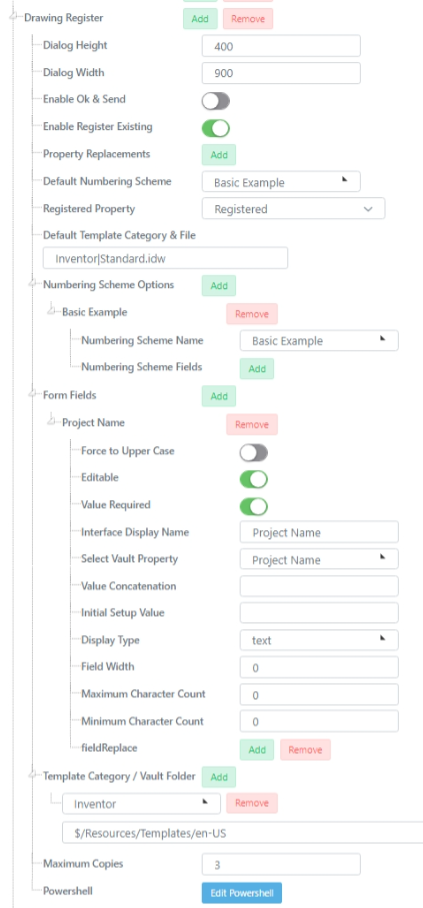
Expand Drawing Register and note the following settings. Only settings mentioned in this guide need configuring, ignore the other settings.
Set the overall size of the Drawing Register application window (that appears within Vault Client). As this is a fairly simple example, we can keep the window small.
The Enable Register Existing toggle allows for the re-editing of previously created files that were generated via the Drawing Register.
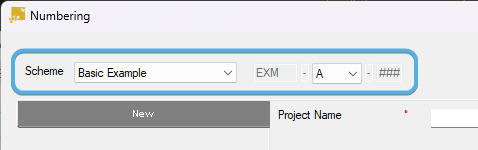
Select the Basic Example Vault Numbering Scheme as the default.
Basic ExampleThis appears as per the below image within the Numbering application.
Set the Default Template Category & File setting, note the | pipe symbol to separate the two.
Inventor|Standard.idwSave the settings. Click the Form Fields setting "Add" button.
Set the following options for the newly added Form Field.
Project NametextSave the settings. Navigate to Template Category / Vault Folder and click "Add". Select the category Inventor and set the path to the resources folder $/Resources/Templates/en-US (the same location as where the drawing.idw file is).
Set Maximum Copies to 3.
Let's now check our progress. Your MinuteView Drawing Register settings should look as per the below image.
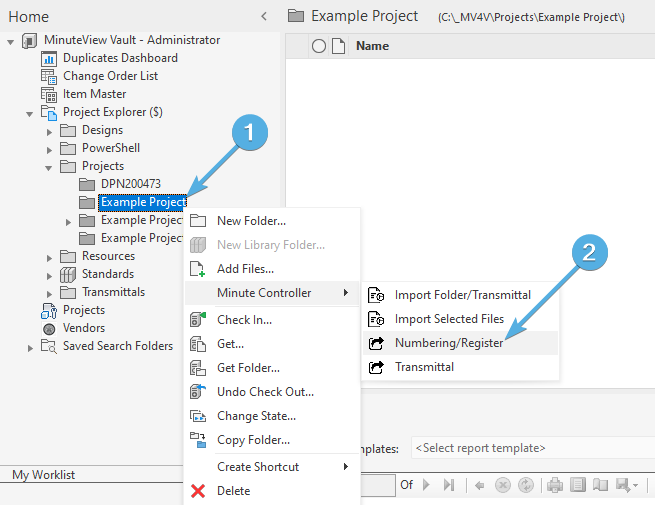
Open up the Drawing Register App within the Vault Client by selecting the file set destination folder within Vault, right-clicking, then select Minute Controller -> Numbering/Register from the pop-up menu.
The Numbering App displays, ready for input as per our basic configuration. At this point in time, we're now using the application as an every day user would.
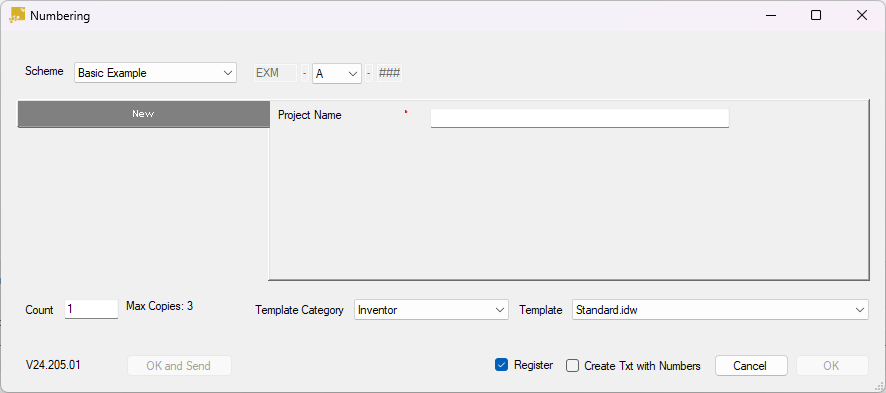
Select from the Scheme options and fill in the Project Name field input. Set the copies to 3, and when ready click OK.

Once the progress bar has finished, refresh your Vault folder to confirm the creation of the file set.
This concludes the basic tutorial. For a greater understanding of the more advanced features, please read the Advanced Numbering Guide.